Showing posts with label Gear Discussions. Show all posts

Tuesday, January 7, 2014

Blog 62: How to Sharpen a Knife

BLOG 62. HOW TO SHARPEN A KNIFE
By Cliff Jacobson


It’s easy to sharpen a knife.  All you need is a whet-stone, some honing oil and practice.  You can use a diamond stone or a natural stone.  No matter: any good sharpening stone will work if you do your part. Indeed, South American natives sharpen their machetes on the side-walk and they obtain a very sharp edge! This method works with any non-serrated blade:

FIRST, SOME RULES
           
1.  Electric and mechanical sharpeners will provide a good working edge but not a wickedly sharp one.  If you want a razor-sharp edge, use a whet-stone!  
           
2.  Don't ever use a grindstone on a good knife!  You’ll destroy the edge and the temper.Those handy "pull-through" sharpeners designed for kitchen knives will produce a quick working edge, but not a super-sharp, polished edge you can be proud of.
           
3.  To obtain a fast "working" edge on a dull knife, begin sharpening with a coarse diamond stone or coarse Carborundum or aluminum oxide stone (available at hardware stores).  A fine-toothed file can be used to remove deep nicks in an abused blade or, to re-form a blade that has a broken tip.
           
4.  Once the edge takes shape, change to a medium grit "soft Arkansas" or "Wachita" stone.  Keep the stone well-lubricated with cutting oil, WD-40, or kerosene.  Do not  use automotive or gun oils! 

5. Diamond stones come in coarse, medium and fine. A coarse stone will take off metal real fast--ideal to set the edge of a new knife.  But once the edge is "set" you'll probably never again use the coarse stone.  Sharpness will be easy to maintain with a "fine" stone.  The point is that you will get far more use out of a medium and fine abrasive stone than a coarse one.  If you want to save money, buy a coarse carborundum stone (hardware store) and use it for tough sharpening jobs. When the nicks are gone, go to a medium grit diamond stone. Finish on a fine Arkansas oil stone. A fine oil stone will produce a highly polished, razor edge.
           
6.  Sharpening will go easier if you dip the cold blade into boiling water for a few seconds before you begin to hone.
From: Camping's Top Secrets, by Cliff Jacobson. For most camp chores--cooking, whittling, etc., a 15 degree angle is best. Twenty degrees is better for knives that will be used hard (cutting into bone, heavy gristle, etc.)

PROCEDURE
Maintain a film of light oil (natural stones) or water (diamond/carborundum, and aluminum oxide stones) to float away the steel particles that clog the pores of the stone and reduce its cutting efficiency.  Every few dozen strokes, dry the stone and blade and apply new oil. Yes, you will go through a lot of oil this way, but you won't dull the edge by grinding metal shavings into it.  Frequent cleaning is essential if you want a super-sharp edge! You don’t need to use a special cutting oil—WD-40 works fine.
 
The "penny angle" trick works only with a narrow blade like that on a Swiss Army Knife.
Keep the back of the blade raised 10-20 degrees and cut into  the stone as you sharpen. If you have a Swiss Army knife, you can approximate the correct angle if you rest the back of the blade on two stacked pennies (photo 1).  Another trick is to set the blade flat on the stone and adjust a bright light directly overhead. Slowly raise the back of the blade until you can just see a shadow.  If you want a whisker-sharp edge for slicing food, use a shallow (about 10 degrees) angle. For more rugged work, 15-20 degrees is best. You MUST maintain the precise angle as you sharpen. Most people need about 30 minutes of hands-on sharpening practice to build the muscle memory needed to hold a consistent angle. You MUST maintain a consistent angle or your knife will never get sharp!

You can buy special tools that maintain the recommended angle as you sharpen.  These tools clamp to the knife blade.  They work well on the body of the blade but not on a sharply curved tip.  If you learn to hold a consistent angle by hand (it just takes practice) you'll never use a clamp.
           
This is a medium grit Arkansas stone. Generally, carbon steel blades like this old Case knife, will take a faster and keener edge than stainless.  
Take about six strokes per side on the stone. Keep the stone flooded with lubricant.  If you want a razor’s edge, switch to a fine-grained stone (natural or diamond), then finish by stropping the blade on a leather belt. Strop the edge away from the leather, not towards it as  when using a hone.

CHECK FOR SHARPNESS
            There are many ways to check blade sharpness.  Here are a few:
  1. A razor sharp knife will shave hair from the back of your hand.
  2. Shine a bright light on the sharpened edge. A dull edge will reflect light.
  3. Drag your thumb nail lightly across the blade.  The blade should scrape the nail cleanly, without chattering.
  4. A razor-sharp knife will cleanly slice typing paper.
           
Note:  A sharpening (butcher's) steel will not sharpen a knife. A steel is simply a coarse version of a leather strop. It’s for touching up a well-used blade but it won’t take the place of a whetstone.

Cliff Jacobson
www.cliff-jacobson.com

XXX


Sunday, January 5, 2014

BLOG 61. How To Pick a Good Camping Knife

BLOG 61. HOW TO PICK A GOOD CAMPING KNIFE
By Cliff Jacobson
Clockwise from the top: Grohman #1 flat-ground carbon "Camper"; Gerber Shorty/carbon steel (no longer made);
Victorinox "Forester"; Forschner (Victorinox) #40614; Mora carbon; Old Hickory carbon paring knife; Idaho Knife Works "Cliff Knife" (carbon).  
What do you think is the most important tool to have along on a canoe camping trip? If you said a good sharp knife, you’re in agreement with the experts. But few of today’s knives are sharp, let alone ideal for camping. The best-sellers have thick blades that are better for cutting through car doors than slicing salami and pine!  

A camp knife should be thin-bladed, lightweight and compact. Edge retention is a factor only if you seldom sharpen your knife.  A folding knife is fine, but a fixed blade is more rugged. You can flex the blade or hammer it with a wooden mallet to split kindling and you won’t damage a thing.  And, there’s no folding mechanism that can be gummed up by jam or peanut butter.  But sheath knives can be dangerous, not because their blades don’t close, but because the sheath’s that generally come with them are too thin and flimsy.  If you choose a fixed-blade knife, make your own heavy-duty riveted sheath (my book, “Camping’s Top Secrets”/25th Anniversary Edition, shows how).
Make your own knife sheath.  This project took about an hour. Cost of materials, about $15
MY PREFERENCE


  1.       Four to four and-one-half inches is an ideal blade length.  Shorter won’t reach to the bottom of the peanut butter jar; longer is necessary only for filleting fish.
  2.       Maximum blade thickness is one-eighth inch, and thinner is better, much better! Try cutting paper-thin slices from a tomato with a thick-bladed knife and you’ll see why! 
  3.       Knives with serrated edges are good only for cutting seat belts and rope.  And you need a special hone to sharpen them. 
  4.       Carbon steel is easier to sharpen than stainless steel and it tends to take a keener edge.  High-end (expensive!) stainless alloys are excellent. Cheap stainless is awful!
  5.       A narrow, straight blade with a central point is best for peeling spuds, slicing vegetables and general camp work.
  6.       A flat-ground blade provides truer slicing and is best for all-round use.  A Scandinavian (Scandi) grind, like those found on Mora knives works well for whittling and splitting. Hollow-ground blades are easier to sharpen to a razor's edge than flat-ground or Scandi blades but they aren't as strong. 
  7.       Avoid knives that have a long unsharpened area near the handle; a dull spot here shortens the cutting edge and reduces cutting leverage near your hand.
  8.       A beefy, hand-filling handle provides more control and better leverage than a short, thin handle.
  9.       If you want a rugged fixed-blade knife, one that will withstand frequent flexing, choose a model whose blade runs the full length of the handle.
You can buy a good knife for under 25 dollars. American made pocket knives (with one or two blades), genuine Swiss Army knives (Victorinox and Wenger), and the Official Boy Scout pocket knife are best buys. If you want an inexpensive sheath knife, Canadian survival expert, Mors Kochanski recommends the carbon steel Swedish Mora knife (shown above).  It comes with a rugged Scandinavian style sheath and costs under 15 dollars.  It's not pretty, but it is efficient and it comes from the factory sharper than many custom knives.

Next time: How to sharpen your knife to a razor’s edge.

Cliff Jacobson
www.cliff-jacobson


Sunday, December 15, 2013

BLOG 60. Easy way to repair gel-coat damage on your canoe

BLOG 60.  Easy Gel-Coat Repair
by Cliff Jacobson

If you own a fiberglass or Kevlar canoe, one thing is certain: one day you’ll hit a rock and chip some gel-coat off your canoe.  If you’ve tried to repair damaged gel-coat “cosmetically perfect”, you know it isn’t easy. The recommended procedure calls for filling the break with color-matched liquid gel coat, then sanding and polishing to blend the repair. This is difficult and frustrating. largely because: catalyzed liquid gel coat is runny and hard to contain.

            Instead, try this 30 minute method:

MATERIALS:


  •       Epoxy or polyester putty. The rule is to use the same kind of resin for repair that was used to build the boat.  If you don’t know, choose boat-building epoxy which sticks to nearly everything.  Do not use hardware store instant epoxy or any resin that won’t cure rock hard.  If you use epoxy or polyester resin in place of putty you’ll have to thicken it to make a putty that won’t run. The simplest way is to just cut some fiberglass cloth into tiny pieces. Keep adding the chopped glass into the resin until a thick putty consistency results. Better  yet, buy a powdered fiberglass thickener--it's very inexpensive.  I've had good luck with Ad-Tech, West System and Rapid-Cure epoxies.  There are slow and fast-cure formulations.  Fast cure works best for general and gel-coat repairs. Check out the options on line.


This broken seat was repaired with Rapid-Cure epoxy. Noatak River, Alaska


  •       MEKP hardener for polyester resin.  Two-part resin and hardener for epoxy.

  •       popsicle stick for spreading the putty

  •       120  and 400 grit sandpaper

  •       Matching acrylic auto paint (brush or spray)

  •       If you can’t obtain either epoxy or polyester resin, plain old “bondo” will usually work. Bondo is thick and won't run so there's no need to prop the canoe or build a tape well.  Note: gel-coat is purely cosmetic—it provides no structural strength so it probably doesn’t matter much which resin you use, as long as it sticks solidly to your canoe and has reasonable resistance to abrasion.

PROCEDURE:

1.  Use the tip of a knife to remove the shards of damaged gel coat.

2.  Mask the work area, then catalyze the resin and work it into the break to overflowing. If you’re using polyester, add extra MEKP hardener to produce a “hot” mix.  And do wear safety goggles! You don’t want to get resin or hardener in your eyes!. 

3. When the putty is firm (about five minutes), slice off the excess with a knife.  Allow the remainder to cure for another hour then sand it level with progressive grits of sandpaper.  Finish to silky smoothness with wet 400 grit sandpaper.

4.  Spray paint the patch with matching auto acrylic.  When the paint has dried, buff it out with paste wax and pumice.  Or, use a commercial fiberglass boat wax (it contains pumice) which you can get at any marina.  Your repair will be unnoticeable; down time on the canoe is less than two hours.

The stems of these two canoes have been repaired dozens of times. The paint (flat and gloss black) hides the repair and makes it look like a factory option.
Use this procedure if your canoe has a clear (no color) gel coat or a color that is hard to match.

1.  Make the gel-coat repair as suggested then mask a line at approximately 45o to the stem of the boat.

2.  Spray paint the enclosure any color you like.   Observers will think your handiwork is a custom water line. 

Cliff Jacobson

www.cliff-jacobson.com

Friday, November 29, 2013

BLOG 59. How to Winterize Your Canoe or Kayak


BLOG 59. HOW TO WINTERIZE YOUR CANOE OR KAYAK
by Cliff Jacobson

I live on the Wisconsin-Minnesota border where winter stops boating cold.  Snow arrives in late October and hangs around till May or when insanity sets in, whichever comes first.  By Thanksgiving, even die-hard paddlers have garaged their canoes and waxed their skis!
           
Spring often comes suddenly to Vikingland, and serious paddlers want to be prepared for the first nice day.  So, they repair and winterize their boats before they store them away.   Everyone has an annual ritual.  Here's mine:

CLEAN OUT THE GOOBERS
Wash the hull inside and out.  Flush under the decks of canoes, and deep into the ends of kayaks.  You won't believe how much debris accumulates there.  Gummy tree sap and ground-in dirt can be safely removed with a wet sponge and "Soft-Scrub®" kitchen cleaner. I use Star-brite®. a commercial hull cleaner for serious stains and scum lines.

REPAIR GEL-COAT
It's easier to repair chips on fiberglass/Kevlar canoes if you don't follow the canoe maker's instructions.  Gel-coat is runny and difficult to get a good color match.  Here's my method:

            Materials:  White polyester putty (available at marinas) or auto body bondo.  For the strongest repair, mix colloidal silica or strands of chopped fiberglass with epoxy.  Important: use boat-building epoxy, not quick-cure hardware store stuff. Sixty and 100 grit sandpaper, and 200 grit wet-dry finishing paper; color-matched auto acrylic spray paint, paste wax and pumice. Note: gel-coat is purely cosmetic—it adds no strength to the laminate, so it probably doesn’t matter what you use—that is, as long as the resin sticks to your canoe. I recommend epoxy because it is compatible with epoxy, vinylester and polyester hulls.

ROYALEX
Tears and gouges in Royalex are easily repaired with epoxy.  You’ll get a stronger, longer lasting repair if you sand off the thin vinyl layer that covers the ABS substrate before you begin.  Then, just fill in the damaged area with epoxy resin thickened with micro-baloons or other thickener.  When the resin is rock-hard, sand it smooth then spray paint to match the hull.  Use fiberglass and/or Kevlar cloth to repair major damage. Epoxy degrades in ultra violet light so apply 303 Protectant to your finished work.

Procedure:
            1. Pick out the shards of damaged gel coat with the blade of a knife.
            2.  Catalyze polyester putty (use extra MEKP to produce a hot mix) and work the peanut-butter-thick mix into the break to over-flowing.  Thicken epoxy resin with colloidal silica.  Caution: be sure to wear a mask when mixing colloidal silica.  The fine particles go deep into the lungs!
            3.  When the putty is firm, slice off the excess with a knife.  Allow the remainder to cure completely then sand it level with progressive grits of sandpaper.  Finish to silky smoothness with 400 grit wet sandpaper.
            4.  Spray paint the patch with matching auto acrylic.  When the paint has dried, use paste wax and pumice to blend the paint to match the hull.  If you have a natural gold Kevlar canoe (or one whose color you can't match), mask a short artificial water-line along the stem (photo) and paint the masked area an attractive color.
Note flat-black artificial waterline on this solo canoe.  Damage to the stem is easily repaired by filling the gouge with thickened epoxy, then spray-painting.  Don't like black? Choose any color you like.
APPLY ULTRA-VIOLET PROTECTANT
It’s wise to apply an ultra-violet inhibitor (I recommend 303 Protectant®) to the hull at the start of the season and again before you store it away. 303 hides light scratches--gives a slick new look!--and prevents sun damage.  To hide deep scratches, apply Penetrol® (available at hardware stores) and buff with a cotton rag. Afterwards, apply a finish coat of 303 Protectant.

TORQUE THE TRIM          
Canoes flex as you paddle; screws work loose and thwarts and seats crack.  The vibrations of car-topping also have an effect.  Nuts and bolts should be tightened at least once a season, and again before winter storage.  
           
Tip: owners of wood-trimmed Royalex canoes are advised to remove the gunnels (near the decks) of canoes that will be stored in sub-freezing weather—uneven rates of material expansion cause Royalex to crack.
           
Here’s a better plan: Unscrew the wood the rails about two feet back from each end, then slightly enlarge the screw holes in the Royalex (just the Royalex!).  Then, screw the rails back in place. The Royalex will shrink when it gets cold but it won’t crack because the enlarged screw holes won’t pressure the screws. Another option is to horizontally slot the screw holes in the Royalex.  You need only enlarge or slot the holes near the ends; no need to do the whole boat.  Note: By the end of 2014, Royalex will be no longer available (the sole maker went out-of-business).  Take good care of your Royalex canoe--it is sure to increase in value during the coming years!

SUNLIGHT AND MOISTURE
Ultraviolet light is a killer (aluminum canoes are the exception), so store your boat in a weather-protected area out of the sun.  If you use a garage, be wary of windows that project a focused beam of light on to the hull.  If you must store your boat in a light path, apply an ultraviolet protectant to the hull or cover the sun-exposed areas with a cotton sheet.  Do not place black plastic against the hull;  It will encourage condensation and cause the gel-coat to discolor.
           
Winterizing a canoe or kayak is mostly common sense: clean out debris, wash and polish the hull, repair damage, apply an ultraviolet protectant to plastics, oil or varnish the woodwork, tighten bolts and store your treasure in a weather-protected, well-ventilated area, out of reach of small animals.  Get your boat ready before the snow flies and you'll be ready to climb aboard when the rivers run again.

XXX
           

Tuesday, October 22, 2013

BLOG 57. Gransfors Mini-belt Hatchet Review


BLOG 57. GRANSFORS MINI BELT HATCHET REVIEW

by Cliff Jacobson

It's small and light and perfectly balanced. It can sharpen a pencil to a piercing point, slice a tomato paper thin, and shave the print right off this page.  It will frizz fuzz sticks for tinder, cut fine kindling and split small logs. It will fillet a fish, skin a moose, hack through bone, tenderize a steak, turn pancakes, spread jam and peanut butter, pound tent stakes and chop vegetables.  And it will ride as lightly on your hip as the average hunting knife. No, it's not a secret Air Force survival tool; it's the Gransfors mini belt hatchet!
 
Top to bottom: Gransfors "Small Forest Axe", "Wildlife Hatchet", "Mini Belt Hatchet"
My first impression of this miniature axe was "It’s cute, but is it practical? “Now, after years of use, I can can say,  "Wow—it performs better—yes better!--than most hatchets twice its size!

The Mini belt axe is the brain child of Swedish black smith, Lennart Petterson who, like his father before him, has worked for Gransfors Bruks his whole life.  Lennart lives in a small house within walking distance of the Axe forge.  He loves the outdoors and is passionate about fly-fishing and ice-fishing.  He also enjoys making knives, some of which have won awards in Sweden.
Three fine Gransfors axes.  Mini Belt-Hatchet (closest)
For years, Lennart dreamed of one compact tool that would function as both knife and axe. It should be light and small and ride safely on the belt, secured by a sturdy leather sheath and safety strap.  It took Lennart two years to perfect and build his dream.  He even desgined the specially shaped handle.The Swedish name for this little axe is Gransfors Lilla Yxa, which means Gransfors Little Hatchet.  But Lennart Petterson calls it my "Instead of my knife hatchet" which, I think is a more descriptive name.

Check the specs below and you'll see that the mini belt hatchet is almost small enough to qualify as a true miniature.  But use it for serious work and you'll discover it's no toy.  Nearly everyone who has seen this little axe reacts the same: first they smile, then they turn it over in their hands, marveling at the rugged whisker-sharp edge and ergonomic (artistic) oiled hickory handle. They nod approval at the hammer-forged marks on the head and the brightly polished poll which functions as a meat tenderizor and "priest" for administering the coup de gras to fresh caught fish.  One hunter observed that the handle appeared to be molded to the head.  "Fits like a custom gun- stock," he said.  Indeed it does!

Here's how the mini belt axe compares to the standard sized ”Wildlife” hatchet: 

MINI BELT HATCHET
Weight: 11.3 oz
Length: 10.25 inches
Cutting edge (length): 2.5 inches
Length of head: 4.25 inches
Poll width: 0.625 inches
Poll length: 1.2 inches

WILDLIFE HATCHET
Weight: 1lb. 8 oz.
Length: 14.5 inches
Cutting edge (length): 3.0 inches
Poll width: 0.75 inches
Poll length: 1.5 inches

The mini-belt ax is built like every other Gransfors model—solid!  The high carbon Swedish steel blade is hardened to 57Rc, which is nearly as hard as a good knife, and much harder than most U.S. axes.  It  comes from the factory shaving sharp, and with a good-looking, full-grain (one-eighth inch thick!) riveted leather sheath. These hatchets are extremely difficult to make. Forging the huge hole in the small head requires great skill—akin to forging (not laser-cutting) a knife with a giant cut-out in the center.

The  head is secured to the handle in a unique way:  It is driven in tightly (form fit) until it protrudes about one-eighth inch beyond the head.  Then, a wooden wedge is driven in.  The wedge expands the handle and the part that protrudes, in effect, producing a reverse taper (similar to the handle on a tomahawk).  Then, the two wide metal "cheeks" (lugs) on the head are pounded tightly to the wood.  The result is a metal-to-wood bond that should never come loose.  There's no need for epoxy or metal wedges to make up for sloppy workmanship. 
     
Grasp it lightly just behind the head and you have an Eskimo ulu—one that will chop chicken salad and slice meat and vegetables into wispy strips. It will even cut cheese into reasonably thin slices! 

Choke the handle as above but reverse the blade and you have a powerful draw knife that wisks through kindling.  Hack away in the usual manner and it splits wood better than many axes that are twice its weight and size.  The secret is the fine, knife-like edge that tapers progressively to the fairly beefy (0.625") poll—this ain't no simple "wedge grind"!  Note that the end of the  handle is cut at a 45 degree angle ("chopped tail") to facilitate a two-hand hold.  The little axe will slash through large logs fast if you power with both your arms.

It is also a surprisingly effective wood splitter:  I can easily split foot long, six inch diameter rounds by setting the axe head lightly into the end grain, then pounding the head on through with a chunk of log.  Try that with a typical thin-bladed hunter's hatchet!

For go light trips where you don’t need to produce a shedful of firewood each night, the little mini belt ax can’t be beat.

NOTE: Check out the complete line of Gransfors Bruks INC axes in stock at the Boundary Waters Catalog.

Gransfors also makes a number of museum-quality, ancient axes, based upon ax heads found during excavations.  Each axe is hand hammer-forged and duplicated as accurately as possible. I am proud to own the four lugged, 7th Century Chopping ax  pictured below.
 
Seventh Century 4-lugged Chopping ax (museum quality reproduction). Among the first designs to be useful for both fighting and chopping.  Beautiful, isn't it?


A brochure of museum-quality offerings is available from Gransfors. All are custom-order items.
Cliff Jacobson
www.cliff-jacobson.com


Wednesday, October 16, 2013

BLOG 56. Spyderco Military model knife review


SPYDERCO  MILITARY KNIFE REVIEW
Cliff Jacobson

 
Spyderco Military knife (left-handed model shown here)
Spyderco folding knives have long been popular with law enforcement, military and rescue personnel.  And for good reasons: They have superb edge geometry; they are constructed from superior steels and are among the toughest, most intelligently designed and best built folding knives available. There’s a model for every purpose—from skinning game to cutting through airplane doors. 

Generally, I prefer a fixed blade knife when camping. But when I do carry a folder, my favorite is a “left-handed” Spyderco military model. Naturally, this knife is available in a right-handed version too!

About 90 percent of the population are right-handed. I belong to the ten percent that aren’t.  Most power tools and nearly all firearms are decidedly right-handed: bolts, safeties and loading ports are on the right; autoloaders eject hot empties past my face. It’s a tough life, but we lefties learn to cope.

Open a “one-handed” folding knife with your off hand and you’ll likely find that the thumb cut-out on the handle is too shallow to positively grab your thumb. If there’s a liner-lock, you’ll need to push it with your forefinger or pull it with your thumb. Clumsy, isn’t it?

Thanks to Spyderco, lefties have a dedicated folder to call their own. The C36GLE Military Model Left-Hand is identical to its right-handed brother, the C36G, except for the thumb cut-out and Michael Walker liner lock which have been re-located to work with the left hand. For me, a life-long lefty,  working this blade was a revelation. I wondered, do righties always have things this easy?

The flat-ground, double-tapered blade is four inches long and one-eighth inch thick at the back of the spine. Jimping on the spine and choil add control. The blade steel is Cruicible CPM-530V, a high carbon, chromium alloy known for its toughness. The knife is shipped shaving sharp! The checkered G10 handles provide a firm grip. The knife weighs 4.25 ounces and is three-eights of an inch wide. I clipped it to a pocket and went for a brisk walk. I didn’t notice it at all. I might add that this knife looks formidable when opened—I wouldn’t want to meet one in a dark alley!
 
It slices tomatoes like a dedicated kitchen knife
So how does it cut?  Split kindling, slice a tomato, chop vegetables, skin a deer, cut cord or bore through a car door—this knife does it all, powerfully and gracefully. The long sweeping belly of the blade, not the tip, does the work on a cutting board. This encourages efficient slicing. Though I generally prefer a fixed blade knife for wilderness use, I wouldn’t hesitate to rely on this Spyderco folder on a bush trip where help is an airplane ride away. It is an awesome knife!

Cliff Jacobson
www.cliff-jacobson.com


Friday, August 30, 2013

The Best Night's Sleep I've Ever Had Camping in the Boundary Waters


When I find something comfortable I tend to stick with it.  I've used different sleeping pads over the years and I tend to go with the thicker the better because I have a bad back.  Scoliosis doesn't play nice with flat on the hard ground, so I go big, because if I have to splurge on space in the pack, I'm o.k. with doing it for the sake of a great night's sleep.

So… inflate assist or not, by the time you're finished blowing up a 3 inch thick pad, you are red in the face and you feel like you might just pass out.  Especially if you've waited until you're too tired to think straight anyway.  Then you do it for the rest of the crew, because your a good dad and pretty soon everyone wants to know if they should call in the lifeline helicopter.

You know what I mean.  Even after all of that and even if you've got a bag that fits the pad perfectly and won't slide off your neck never seems to be at the right angle when you shut out the last headlamp and call it a night.  Come on, I know how particular most of you all are about your pillow, your preferred position, your eight or nine hours.  Most nights I average 5 or 6 hours and I need them all.  Coffee to follow.

My solution?  Well, first don't be afraid to try new things.  And number two?  Try new things from NEMO.  Nemo is a fantastic company.

Their Cosmo™ series of sleeping pads blow everything else away.  Did you get the pun there?  Three generous inches thick with an integrated foot pump that -- wait, what?  Stop, you had me at integrated foot pump!!!  That's right.  Super easy to use.  A dozen or so steps on the pump with my foot while standing and eating a Peanut Toffee Buzz® CLIF Bar and my new sleeping pad was nearly effortlessly ready to crash on.  The opposite end of the pump area is elevated and serves as nice pillow rise pad like a second pillow under your favorite pillow at home.  It also has a fine tune valve right at your fingertips.  I'm never and I mean never going camping again without a Cosmo™ pad.  Nemo even makes them with a Pillowtop Combo that is so soft you'll think you're laying on a mattress collection in your local furniture store.

This is the product description of the Nemo Cosmo™ Air Pad:
No more blowing until you're blue! Ultra-comfy sleeping pad with internal foot pump.  The Cosmo™ series of pads take inflatable comfort to another level. Cosmo Air™ is a lightweight sleeping pad with an integrated, super-easy to use foot pump. Dual air intakes on the integrated foot pump make inflation fast! This pad has generous 3" thickness. Horizontal I-beam baffles eliminate any bouncy feel and also tend to support body contours better than vertical baffles. Cosmo™ Air offers a lot of comfort in a small package!

SPEAKING OF YOUR FAVORITE PILLOW… Nemo's Fillo™ Luxury Pillow insures that I don't wake up with a stiff neck.  You gotta get one of these!
For $205 you'll sleep like a baby in the woods from now on!

p.s. One of my least favorite things to do is try to roll up a sleeping pad tight enough to fit it back into its original stuff sack.  It seems to take almost as much effort as it does to blow it up.  These are the kinds of activities that I don't relish repeating 5 times when it is time to go home.  The Cosmo™ pad deflates even easier that it inflates, just pull the dump valve at the head of the pad and fold the sides in and roll up nice and compact.  All the air is gone.  No fuss, no muss.

The COSMO Air Pad:


The FILLO PILLOW:

Wednesday, August 21, 2013

BLOG 52. Ten Top Camping Innovations


BLOG 52. TEN TOP CAMPING INNOVATIONS
By Cliff Jacobson

I’ve camped for more than 60 years.  Looking back, here are some of my favorite camping items:

1. DULUTH PACK
Patented in 1892 by Camille Poirier, the "Duluth" pack, as it would come to be known, combined strength, endurance and elegance in a soft, appealing package that was easy to construct and repair.  
 
Duluth Pack--tradition for a reason!
Picture a canvas pillow case with leather shoulder straps, brass buckles and a long closing flap.  Add a tumpline and you have a Duluth pack.  Unlike modern packs which must be laid flat in a canoe—their mouths in contact with bilge water--Duluth packs sit upright, out of the wet.  They are as comfortable to carry as any modern pack, if you use a tumpline.  They are less expensive too—important to the canoeist who may need several packs for a long trip. Space counts on a canoe trip; an empty Duluth pack can be folded and stored inside another pack.

2. NALGENE BOTTLES
I discovered Nalgene® bottles in the mid 1960’s while teaching high school science in Indiana.  Most of the chemicals we purchased came in them. When the bottles were empty, I scrubbed them out and zealously saved them for canoeing.  They were the most air-and- watertight bottles available at the time, and their thick plastic walls made them virtually indestructible. What really made them special was the thread design of the cap, which absolutely, positively, never leaked.  When Nalgene discovered that campers hoarded used bottles they began producing them for the outdoors market.  Colors and varied shapes followed. Today, there are lots of competitive containers that work well for canoe tripping, but in my opinion, Nalgene ones are still the best.
 
Nalgene bottles--best in the business!
3.  SILICONE NYLON TENTS AND TARPS
Silicone-coated fabrics are much lighter and stronger than those treated with polyurethane. Rainwater beads rather than pools, and the surface dries almost instantly. A sil-nylon tent will consume less pack space than an identical one treated with polyurethane. Silicone-treated nylon has been around for some time, but because it doesn’t meet North American “fire-retardant” standards, it’s used sparingly on U.S. and Canadian tents. The coating may be used for exterior tent flies but not for inner canopies where people reside. An “approved” fire-retardant, polyurethane-coated nylon tent won’t burn but it will drip hot liquid nylon onto your skin! The resulting burn may be worse than that from an open flame!  All the best European tents are built from sil-nylon so the fire-retardant ploy is probably just an attempt to keep ultra-light foreign tents out of North America.  Call your government reps and tell them that Americans are being left in the dust!
Syl nylon tarp (Lean 3 by Cooke Custom Sewing)

4.   PRIMUS/OPTIMUS GAS STOVES
The Primus stove was invented in 1892 by Swedish machinist Frans Lindqvist. It was basically a blow-torch with a brass plate that evenly distributed the flame.  Lindqvist’s invention quickly earned a reputation for reliability and durability. It was used by Roald Amundsen, Admiral Byrd, Mallory, Tensig and virtually every 19th and early 20th century explorer. Primus stoves have been in continuous production for more than a century and in my opinion they are still the best. They feature all metal—stainless steel, brass, aluminum—construction. There are no plastic parts to burn or break. Field maintenance is simple. For example, the aluminum pump consists of just two parts—the shaft and easily replaced pressure cup. For solo trips, I often use my ancient (1952) M71 Primus (photo) which still runs flawlessly. Mostly, I rely on a Primus “Omnifuel” stove, which runs hotter than my ancient Optimus 111B.  
 
L) Primus 71, R) Primus Omnifuel
5. GORE-TEX®
Conventional rain gear is waterproof but not breathable—sweat may make you wetter than rain! Gore-tex®, invented in 1976, is both breathable and waterproof and therefore much more comfortable to wear in rain. Most of the best garments, hats and boots feature Gore-tex in their construction.

Early Gore-tex garments leaked when they became soiled, but this problem has long been solved. Today, the major shortcoming is inadequate ventilation—the tiny micro-pores just can’t eliminate perspiration as quickly as uncoated nylon. For this reason, many paddlers rely on a porous nylon shell for wind and a Gore-tex parka for rain. This is a good plan because any garment that’s worn all the time will ultimately develop holes. Some Gore-tex jackets have arm-pit zippers for ventilation, but these work better for hikers than for canoeists who raise their arms when they paddle. Parkas that have fully waterproof (wet-suit style) zippers are best for paddlers. 

6.  BRASS CANDLE LANTERN
Hang a candle lantern in your tent on a cold, dreary night and watch the flickering shadows dance around your tent.  The tiny flame warms your tent—about ten degrees—enough to kill the chill. If you have young eyes, the little flame provides light enough to read a book. 
Brass candle lantern
The Stonebridge folding candle lantern, patented in 1900, was the first folding candle lantern that could be easily packed and safely used inside a tent.  Originally built from brass, with mica windows, it folded flat  (just one-half inch thick!) for storage. But it’s mica windows were fragile and the base leaked wax. The tubular candle lantern, which appeared in the 1950’s, was more rugged and compact; it had sliding glass windows and it didn’t leak wax.  Like most modern paddlers, I rely largely on an LED headlamp to illuminate the night.  But for warmth and ambience, my candle lantern rules the night.

7. LED HEAD-LAMPS
LED lamps get brighter and less expensive every year.  The “bulbs” last almost forever and, when powered by Lithium batteries, they’ll light your camp for several weeks. I threw out my old flashlights years ago!

8.  INSULATED FOAM SLEEPING PADS
Thermarest® started the revolution, now there’s lots of competition.  NEMO and EXPED insulated models are my current favorites.  Why? Because they’re super thick and comfy, even when sleeping on base ball size gravel.  And they have optional breathable covers which absorb sweat and add durability.

9.  GRANSFORS AXES
These hand-forged Swedish made axes are unoquivocably the best in the world.  Hardened to 56C Rockwell, with double-peened lugs, the head can’t come loose.  Superb edge geometry encourages split wood to literally fly apart when struck.  Expensive and worth it!
Gransfors axes

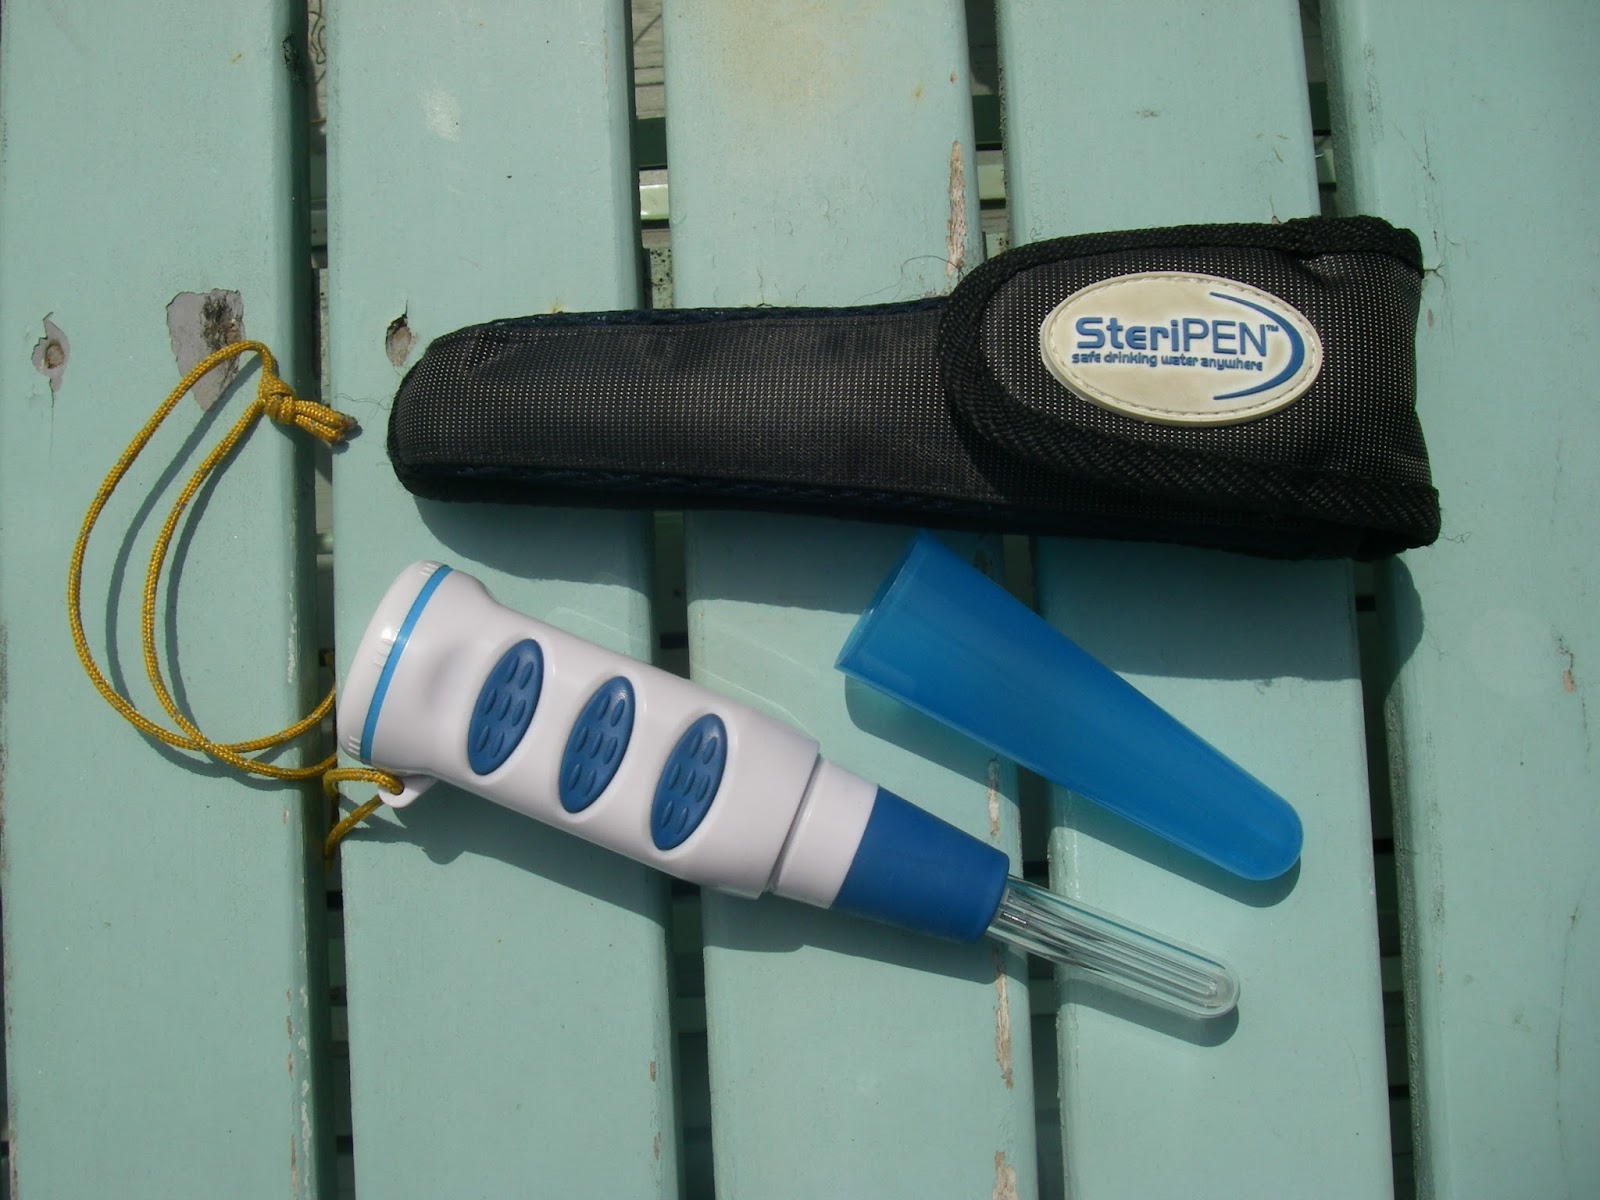
10.  SteriPen
The SteriPen (www.steripen.com) is my favorite water-purification device. It is a pen-like product that uses ultraviolet light to purify water.  No chemicals are involved so the treated water has no aftertaste. I’ve used it from the Boundary Waters of Minnesota to the Alaskan tundra, and when traveling abroad. It has never let me down. All you need are batteries and you’re good to go!
SteriPen

Cliff Jacobson
www.cliff-jacobson.com

XXX

Wednesday, August 7, 2013

BLOG 51. Review: aLOKSAK Waterproof and Odor-proof Bags


BLOG 51. Review: aLOKSAK Waterproof and Odorproof Bags
by Cliff Jacobson


Many paddlers rely on zipper-lock plastic storage bags to waterproof small items like money, matches, toilet paper, etc.  But zip-lock bags are at best, marginally reliable, less so if they’re over-packed or compressed by a load. aLOKSAK® bags (www.loksak.com), which are constructed from a tough, resilient plastic, are far stronger and more waterproof. They have a triple seal that holds even when the bags are substantially compressed. aLOKSAK’s are certified “waterproof” to 60 meters (197 feet!). Ordinary zipper-lock bags can’t compare.
 
 SPLASHSAK Phone Caddy and Navigator Map Case
LOKSAKS come in many sizes, ranging from 3.4 x 6.4 inches (a snug, smart phone fit) to a giant 12 x 48 inches—large enough to accommodate a sleeping bag and pad. I’ve been using aLOKSAK bags on my canoe trips for many years and I have found them to be extremely reliable. They are quite inexpensive.

I am also fond of the company’s odor-proof OPSAK” bags which keep odors in and water out. OPSAK’s are government-approved as long term biohazard bags, so you know they really work. I’ve used them on canoe trips to transport raw and cooked fish fillets and I’ve never had a problem with varmints. The plastic film does not contain BPA or leachable chemicals so you can safely store food inside. OPSAK’s are flexible and shatterproof and they won’t wilt if you add boiling water to rehydrate food. Important: You will compromise the odor-proof feature if you touch the outside of the bag with contaminated hands. When in bear country, it may be wise to wear vinyl medical gloves when loading smelly edibles into these bags. Note: Although OPSAK’s are reliably waterproof, they are not as strong and flexible as aLOKSAK’s.  
 
Used WAG Bags will remain odor-free much longer if you insert them in an OPSAK bag
Some, mostly western U.S. national parks require that human waste be packed out.  Some campers bring a dedicated toilet system, such as the PETT®, but paddlers are better off to stick with lightweight, disposable WAG bags® or Biffy bags®.  My experience with WAG bags is that they become foul-smelling after about three days; Biffy bags (which utilize an odor-proof Mylar foil bag) stay smell-free much longer.  We place used “potty bags” into a 12” x 20” OPSAK bag, which in turn goes into a waterproof nylon dry bag. This belt-and-suspenders procedure ensures reliable odor-proof protection over the long haul.
 
Biffy Bags (www.biffybag.com) utilize an odor-proof mylar bag and stay odor-free for a week or more
LOKSAK makes a number of different “SPLASHSAK’s”, each designed for a specific function: I especially like the “phone caddy”, passport caddy” and the clear plastic NAVIGATOR  map case which has a carry strap and snap-hooks and is sized right for Boundary Waters maps. There are other map cases too, including a military version that has a pocket and tri-fold cover.  aLOKSAK and OPSAK bags are widely used by adventure racers and the military. I highly recommend them. 

Cliff Jacobson
www.cliff-jacobson.com

Followers